Project Summary:
Materials Needed:
Preparing your pot is an essential step to repotting your tree. In this tutorial, we’ll go over the steps to properly prepare your pot for a new tree. We’ll show you how to attach your drainage screens as well as set up wire in your pot for securing the roots of your tree to the pot, a crucial element that most people overlook.
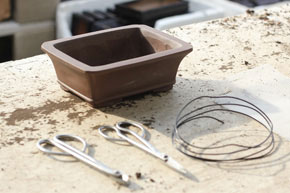
Step 1: Gather your Materials
Gather your pot, wire, drainage screen, wire cutters, and shears on your workbench. We recommend going with 2mm wire due to the thickness. The thicker wire makes it easier to attach the screens to the pot. It also makes it sturdier when tying the roots of your tree during repotting.
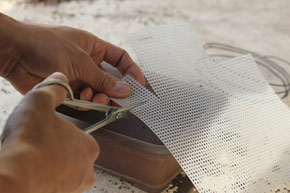
Step 2: Cut Drainage Screens
Roughly measure the size of the drainage screen you’ll need to cover the drainage holes on your pot. Cut a square a little larger than the hole. This will ensure that it will cover the entire hole as well as the edges. The drainage screens prevent your soil mix from escaping during watering. They also help to keep out unwanted pests.
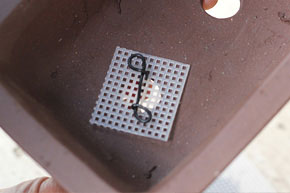
Step 3: Create the Drainage Screen Loops
Cut a short piece of 2mm wire and form little loops similar to the picture to the left. Use your Jin Pliers to bend the wire into place if needed. The result serves as a stopper to keep the drainage screen in place. Leave the ends extended so you can insert them through the drainage holes.
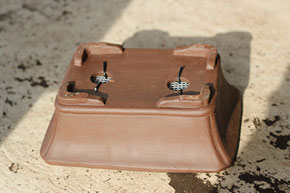
Step 4: Attach Drainage Screens to Pot
Insert the ends of the wire through the drainage holes on the other side of the pot. Bend the wire outwards to secure the drainage screen to the pot. Repeat with both drainage holes.
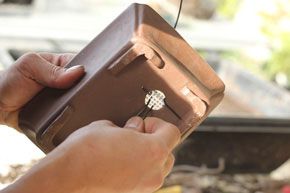
Step 5: Weave Wire through Drainage Holes and Screen
Cut two more pieces of wire about 1 1/2 the length of the pot. This wire will be used to tie the roots of the tree to the pot. Weave the wire through both drainage holes. You’ll need to go through the screen and the drainage hole. Repeat this two times to form an “X” with the wire. You’ll use this “X” to create a net to hold the tree’s roots in place.
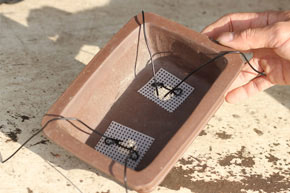
Step 6: Your Finished Prepared Pot
Your prepared pot should look like the photo to the left. Your pot is now ready for soil mix and your tree.


Finished the Project?
We’d love to see how it turned out. Tag a photo of your tree on instagram or twitter with #easternleaf for us to see or feel free to direct message us at @easternleaf for some helpful feedback and tips.
We also have giveaways on maintenance and styling supplies regularly on Twitter, Instagram, and Facebook.
We also have giveaways on maintenance and styling supplies regularly on Twitter, Instagram, and Facebook.


You must be logged in to post a comment.